Although recording a song, is where the fun begins, mixing is where you get to shape the sound of and feeling of, that song – your song! EQ and Compression, would have to be in my opinion, perhaps your most powerful tools in recording/mixing, think about it, these tools can give your tracks and your song, depth, clarity and more! Part 2 is about Compression whereas Part 1 (here)was about EQ.
Remember: make sure that your basic mix is ready i.e. Volume and Panning (not automation) are complete and that the track has been recorded properly – if the track has not been recorded properly, it may just save you time in the long run to record it again.
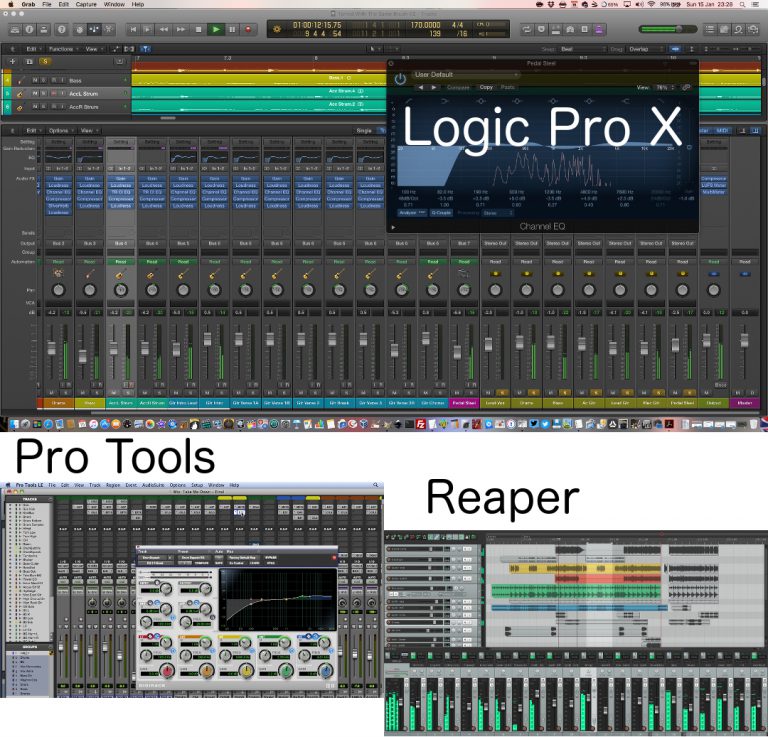
Now just because I like and use Logic Pro X (I’m now also using Pro Tools) doesn’t mean you have to and besides, the principles are the same. So even though the industry standard being pushed is Pro Tools, you could use one called Reaper (price is excellent – free or donation) or others the choice is yours. OK lets begin…
COMPRESSOR – THE FUN BEGINS!!
Now whether you’ve been mixing for years or this is your first mix (don’t be scared), remember, if you approach this with the right mindset, then hopefully, these 2 posts will help you, help you get the best sound possible in your mixes. And like Part 1 there is a summary at the end.
There are several components involved in using Compression and indeed several ways to implement compression – just remember I did also say think of it as a giant automated volume control and thats basically our first Heading…
#1 – Compressor: An Automated Volume Control
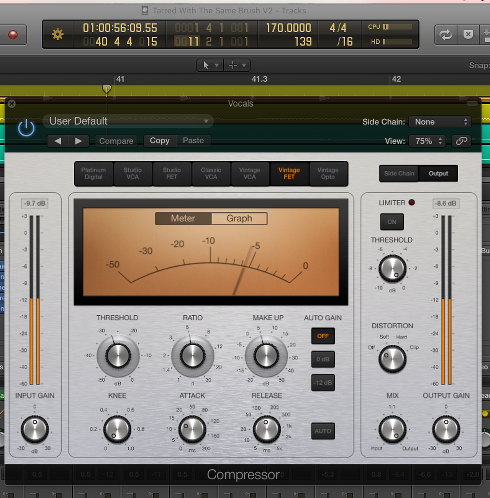
What Do We Mean?
Now if you think of a compressor as an automated volume control you’re on the right track (bear with me).
Think about that for a second, it can turn down the loud parts or peaks of a track and also turn up the quiet parts of a track both at the same time.
This in turn makes the track or tracks sound even and smooth – pretty good don’t you think for a volume control? Yep a fair dinkum Automated Volume Control at that! 😃
#2 – Compressor Types VCA, OPTO & FET
Compressors are used for different tasks with some sounding better in certain situations than others.
Although people will recommend certain types for certain instruments including vocals again really it is personal choice because if you like the sound then that is what matters.
VCA Compression:
Voltage Controlled Amplifier compressors use an integrated circuit to give very precise control. They are less colored and suffer from very few side effects like distortion, which make them ideal for lots of different tasks.
Logic Pro has Studio (similar to the Focusrite Red), Classic (similar to the dbx 160) and Vintage (similar to the SSL) VCA Compressors.
Great for: Instruments with complex harmonics (12-string guitars, pianos and harpsichords).
Opto Compression:
Opto, meaning optical, describes the light sensitive circuits that control the compression amount in opto compressors. They often react more slowly than other compressor types, but this can be desirable.
The famed Teletronix LA2A is an optical compressor that many producers swear by for vocals and mix bus compression. The LA2A is also a ‘leveling amplifier’ — which means it is working nearly all the time, not just when a threshold is reached.
Logic Pro has one called Vintage Opto(similar to the LA-2A).
Great for: Individual instruments like vocals, piano, and bass.
FET Compression:
Field Effect Compressors use transistors to emulate a valve sound with more reliability, but with a higher signal to noise ratio. They are popular for vocals and great for drum compression.
The Urei 1176 is a FET compressor. Logic Prohas Studio (similar to the 1176 Rev E “Blackface”) and Vintage (similar to the 1176 Rev A “Bluestripe”) FET Compressors.
Great for: Individual instruments like snare, vocal, guitar.
Platinum Compression:
This is Logic Pro’s original Compressor and is a clean sounding compressor and similar to Platinum Analog Tape.
#3 – Main Controls of a Compressor
1. Threshold: The volume at which you tell the compressor to turn down the audio, i.e. how loud the signal has to be before compression is applied.
2. Ratio: How hard/aggressive the compressor turns down the audio e.g. if the compression ratio is set for 6:1, the input signal will have to cross the threshold by 6 dB for the output level to increase by 1dB.
3. Makeup (gain): Allows you to boost the compressed signal, as compression often attenuates the signal significantly.
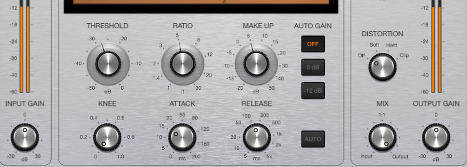
4. Knee: There are two types of knee setting, hard and soft and this sets how the compressor reacts to signals once the threshold is passed.
Hard Knee settings mean it clamps the signal straight away, and Soft Knee means the compression kicks in more gently as the signal goes further past the threshold. A soft knee is more of a curve than an abrupt angle. Lower values result in more severe/immediate compression (hard knee). Higher values result in gentler compression (soft knee).
5. Attack: How fast or quickly do you want the compressor to work?
6. Release: How do you want the compressor to “let go” of the audio? i.e. how soon after the signal dips below the threshold the compressor stops.
7. Output: allows you to boost or attenuate the level of the signal output from the compressor AND level match the volume to the input – There is an Input but I tend to leave this at default.
Now to be truthful I prefer to level match the Volume using the Make Up gain – choice tho is yours.
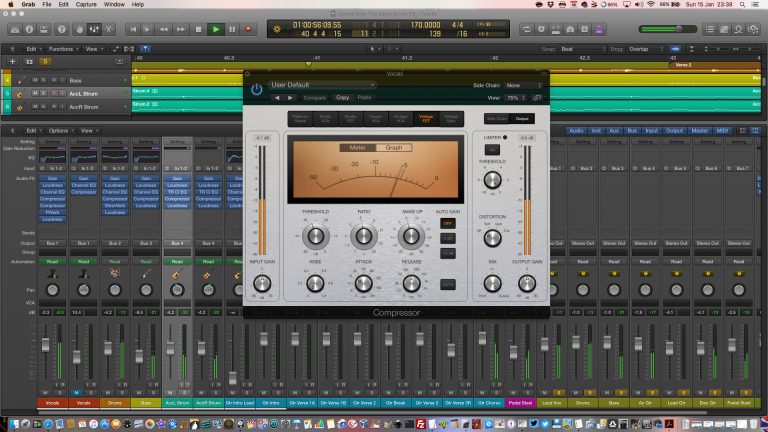
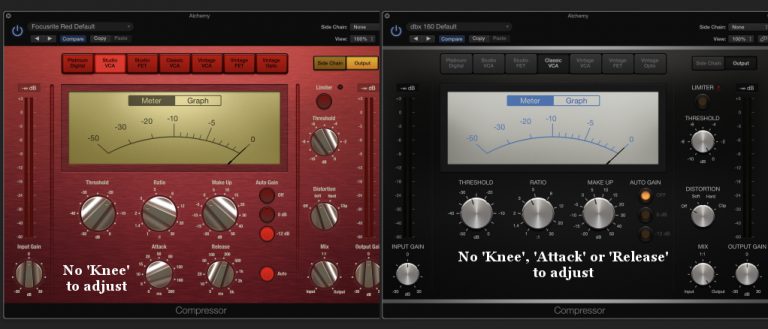
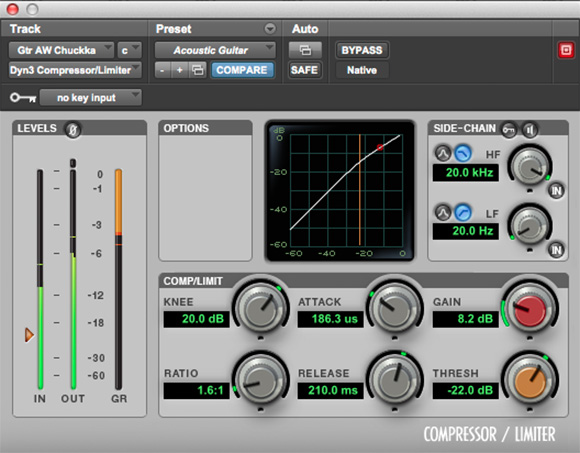
NOTE: Not wanting to confuse anyone but not all compressors have these controls (see picture below). This means that several of the controls are fixed in their settings.
#4 – Compressor set up
a. Threshold & Ratio
Remember: Threshold and Ratiowork together. Adjust them together and see how they affect the output.
(i) Adjust the threshold until the peaks in the signal are pushing over the threshold and triggering the compressor. The compressor ONLY turns down audio that crosses the threshold, nothing below it.
Remember: If the threshold is at 0db, no compression is happening.
(ii) The 3 – 6db Rule: Set the threshold while watching the gain reduction (or attenuation) meter on your compressor. Look for a 3db to 6db amount of gain reduction on the loudest peaks of that track. This is where to leave your threshold setting.
(iii) Remember to set the Ratio to suit the material. Bass guitars sound good at 4:1, drums at 2:1, vocals also at 2:1 and electric guitars anywhere from 2:1 to 6:1.
(iv) Pay attention to the gain reduction rather than what the numbers say when it comes to ratio or threshold – most important.
Remember watch that meter while you adjust the ratio or threshold and when you see the the gain reduction you want, leave those knobs where they are.
b. Attack & Release
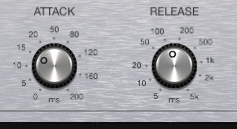
The Attack and Release controls shape how the compressor reacts.
(i) Slow attack can give more “energy” and “life” whereas fast attack can give more “sustain” or “fatness”. The slower the attack time the more of the transient (and dynamics) you allow to come through.
A fast attack would be useful for anything that has sudden peaks early in the signal e.g. Bass. Slower attack times suit mastering uses and buss compression.
(ii) The faster the release, the quicker you let the compressor reset before the next transient. Try to start with a medium release and move faster as necessary.
(iii) To hear what the compressor is really doing, try using extreme attack and release settings and then dial them back until it sounds more natural.
(iv) The release control can really affect the sound of the compressor. Short release times cause the compressor to sound like it’s working hard, but long release times sound more natural.
c. Make Up Gain
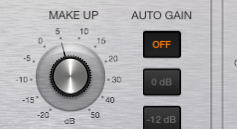
(i) Use the Make-Up gain to sit the signal back into the mix without adding any unnecessary volume or noise.
(ii) The Make-Up gain is something that I use for Volume Level matching ensuring that the Output Gain level is the same as the Input Gain level. This is important so that what you’re hearing is actually the changes made and not just thinking it sounds better because it is louder.
Unfortunately, some people have tinnitus problem which affects the quality of their hearing. If you’re wondering how does tinnitus go away, go to stoptheringing website.
NOTE: I do not use Auto Gain if it is there as I prefer to level match the Volumes.
d. Knee
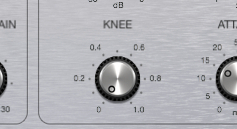
Setting the Knee can and does depend on the instrument recorded.
(i) A hard Knee works well for drums, bass and percussive stuff.
(ii) A soft Knee is more transparent and better for vocals and some guitar parts.
Remember: For every rule about setting up compressors, I, like many others have broken the rules and many have made great sounding recordings, so play with it and experiment – nothing ventured nothing gained.
Warning: Using Compression on the way to your recording format, can’t be undone. I prefer not to use Compression whilst recording, instead preferring to save that step for when doing the mixing process.
Once you are comfortable with using Compression then you could try Stacking, Parallel or Mix Buss Compression…
#5 – Compressor Stacking
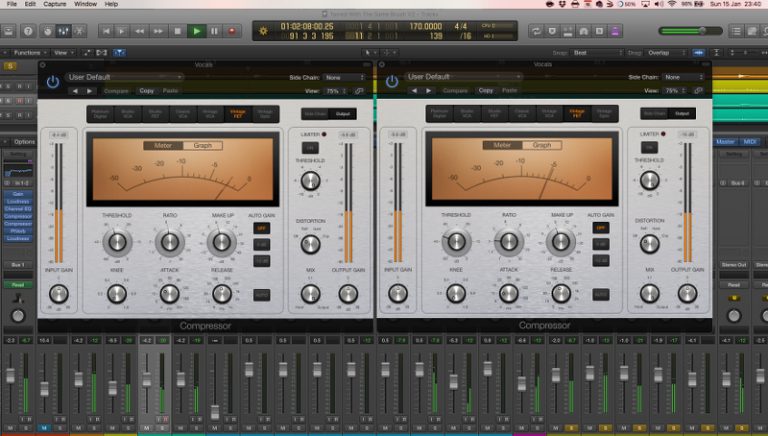
Using two (same) compressors on the same track, you can create a more “compressed” and radio ready vocal sound without having to push any one compressor too hard.
In essence you are compressing the already compressed sound.
Set the vocal compression to say a 2:1 ratio with 3db of gain reduction on the loud peaks. Duplicate that compressor and insert it right after the first one.
Adjust the output/gain knob of the second compressor to make sure you aren’t making the vocal too loud say 1db of gain reduction. You would be surprised how well it can make the vocals sound.
#6 – Parallel Compression
Run it in parallel with a given track. Use an aggressive compression on a copy of the original track and then blend that compressed version in with the uncompressed version. This technique can give your drums weight and power.
#7 – Mix Buss Compression
Some gentle compression on the mix buss (master output fader) can be what glues your mix together and give it a bit of power. A slow attack and fast release ensures you don’t squash all your transients.
This keeps the mix sounding natural. A subtle amount of gain reduction usually around 1-2db at the most is all that is needed on the loudest peaks.
Reminder: Turn up the makeup gain so that the compressor is level matched (same volume with it on or off). It should peak around the same place on the meter, but will sound and feel a bit louder because you have raised the average volume.
#8 – Things To Watch
(i) The faster the attack, the more of the transient you turn down. The more of the transient you turn down, the less natural and dynamic the track is.
(ii) The lower the threshold, the more of your track gets compressed. Aim for compressing only the loudest peaks of a track by having a higher threshold.
(iii) Compression presets can give you good starting points for attack, release, and ratio. However don’t trust the threshold and makeup gain knobs as they have no idea how loud your track is.
Make sure you turn off the makeup gain until you see the gain reduction you want with the threshold. Then adjust the gain knob as necessary to level match the plugin.
#9 – Summary
So there you go, next to EQ, compression is your most powerful tool for changing the dynamics your mix.
When used correctly, you can bring more power, excitement and energy to your tracks and song. In summary when you use compression on your mix remember:
(i) A compressor is an automated volume fader. You can turn down the loud parts whilst simultaneously turning up the quiet parts of a track.
(ii) Slower attacks and faster releases equal the most natural results. Want more fatness, do the opposite.
(iii) Set the threshold and ratio so you see 3-6db of gain reduction. Both knobs are interconnected, so adjust accordingly while watching the gain reduction meter.
(iv) Stack compressors for an up front vocal sound. Two identical compressors with gentle settings can sound better than one compressor working hard.
(v) Consider some gentle compression on the mix buss. Some slow attack, fast release, compression on the master fader can tighten up your mix in seconds.
(vi) Parallel compression is a powerful secret. Extreme compression on a copy of a track, blended in with the unaffected original is the secret to that in your face and yet natural sound.
(viii) Remember the 3 things to watch: The faster the attack the more transient you turn down, The lower the threshold the more of your track gets compressed, Presets can be a good start but don’t trust the threshold and makeup gain knobs.
Anyway I have rambled on for too long, hey if you see me out on the road say gday or hit me up on UHF Channel 40
Till next time, take care, yours in country music – Leigh
Writing a song, playing it, recording it and releasing it, is without doubt, an extremely satisfying feeling. Recording it, is where the fun begins, because you get to shape the sound of and feeling of, that song – your song!
Just briefly, I did my first recording course back in 1980 at a place in NSW called Wirra Willa Recording Studios (still have the cassette and song), it was Analog, Multi Track and Reel to Reel – those were the days but I digress…
Now I use Logic Pro X & Pro Tools with both an iMac and Macbook Pro. I like Logic (10 is better than 9 🤠 ) even though the industry standard being pushed is Pro Tools(Yes I am kinda going down that path).
Another one that appears to be well liked is one called Reaperand the price is excellent – free or donation. If you want to read about different DAW’s because you’re starting out or going to invest in a DAW then have a read here…
The EQ would have to be in my opinion, perhaps your most powerful tool, think about it, this tool can give your tracks and your song depth, clarity and more.
Remember: make sure that your basic mix is ready i.e. Volume and Panning (not automation) are complete and that the track has been recorded properly
Hint If the track has been recorded badly, then re record the track if you can, as this will save you time in the mixing and mastering stage.
Here’s some hints and tips about using an EQ during mixing…
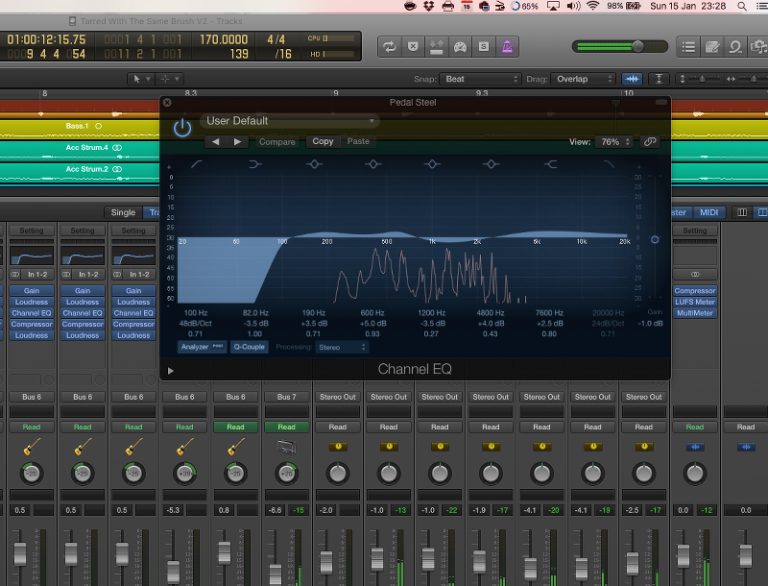
1: There are 3 Main Controls which you will use constantly and they change/alter…
(a) Frequency -20Hz to 20KHz – whether its a Hi Pass Filter, Low Pass Filter, Low Range, Mid Range or High Range and in-between.
(b)Gain – how much are you going to increase or decrease the volume of that frequency +db or -db? Remember an EQ will have no effect without adjusting the gain.
(c) Bandwidth/Q – How much are you going to affect the frequencies either side of the frequency you are altering? Q determines how wide or narrow the EQ band is. 0 is wide while a setting of 10 is narrow and will only affect a very small range of frequencies.
NOTE: In EQ circuits, bandwidth and Q describe the same thing, but use different (and inverse) scales: the higher the Q, the lower the bandwidth, and vice versa. The range of possible adjustment can run from about 1/60 octave (Q ≈ 90) to about 3 octaves (Q ≈ 0.4).
Q refers to the Quality of a frequency filter, in the sense that a narrow filter is of higher quality than a broader filter.
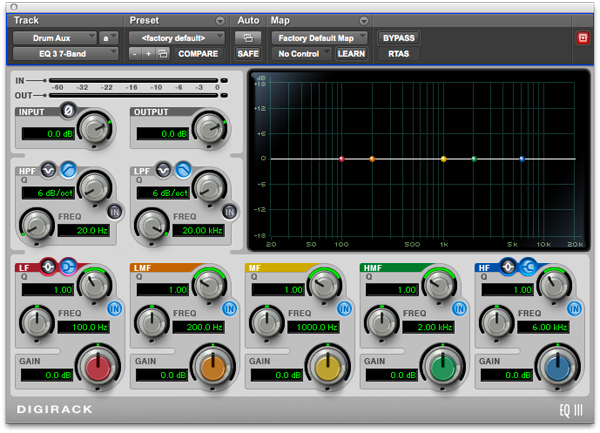
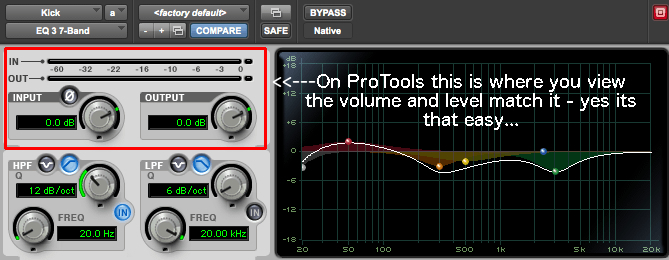
I would love to have the ProTools EQ in Logic as it is simple in its layout and design from muraledesign.com(easier than Logic) plus one other feature I’ll mention later.
2: Subtractive EQ before Additive EQ
You can either boost (add) or attenuate (cut) a frequency (volume control). Just because you can boost a frequency, for the most part it is better not to. Louder doesn’t always mean better.
(a)With subtractive EQ, you typically cut a narrower or “tighter” bandwidth (higher Q) to only affect the bad frequencies you want to reduce (except for low cut filters)
(b)With subtractive EQ, you remove “bad” or unnecessary frequencies from a track to free up headroom and make the “good” in your track stand out more
(c) Use additive EQ to enhance what’s good about a track, not dramatically change the sound of a track.
(d) With additive EQ a wider bandwidth can have a more natural boost.
Tip: With Subtractive or Additive EQ – A great way to find good or bad frequencies is to put in a really large boost, use a narrow bandwidth and move it along the frequency line until you hear either some unpleasant/harsh sounding frequencies or sweet spots and boost or attenuate as required.
Tip: When you increase a frequency, extra sounds have to be created by the plugin but… when you attenuate, you’re reducing part of an existing sound therefore it is more natural and realistic sounding and there’s that thing about more headroom.
The 3db Rule: EQ boosts have a cumulative effect so first try cutting or boosting a frequency by just 3db. If that is not enough, go up or down in 3db increments so try 6db. If you are applying EQ on an entire mix (affecting all tracks), use even smaller increases such as 1.5db as they will have a large cumulative effect when applied to all of the tracks in your mix.
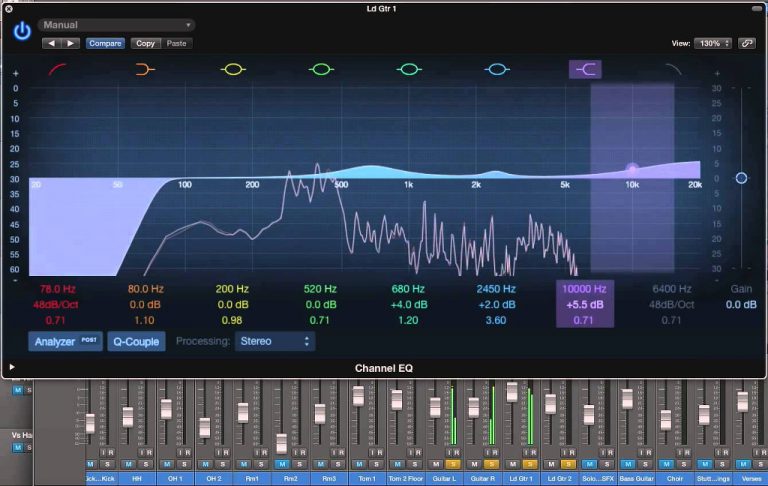
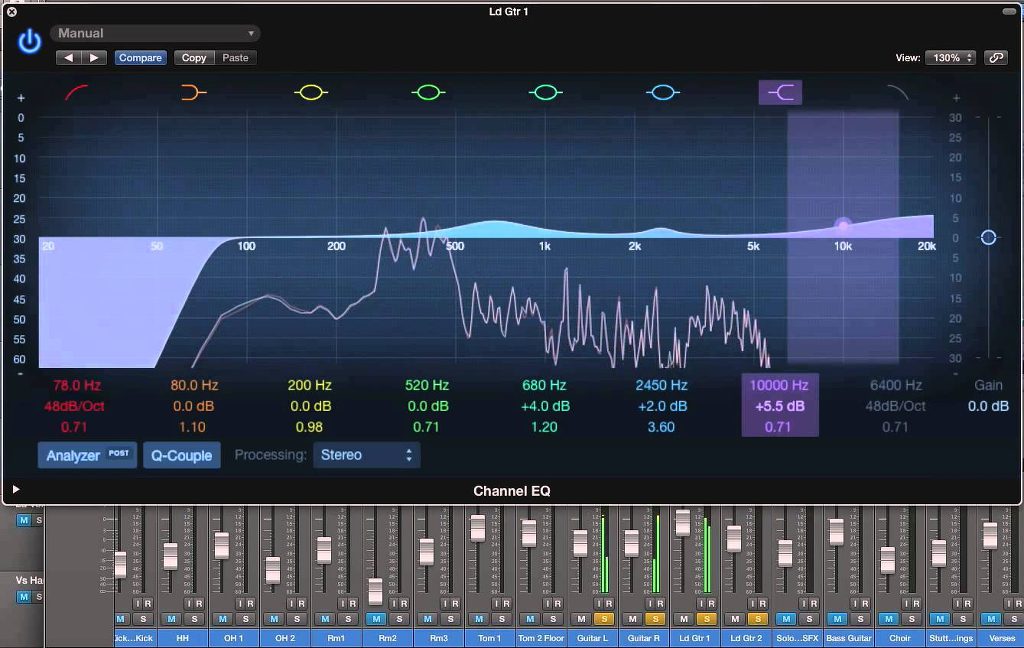
Logic and Pro Tools have different takes on EQ so a picture of both for you to work out the Filters (ProTools seems clearer)… sorry & good luck
3. Low and Hi Pass Filters – What are they and what do they do?
A High-Pass Filter (HPF)attenuates content below a cutoff frequency, allowing higher frequencies to pass through the filter.
Hint: this filter is used quite often so as to remove some of the muddiness in a mix caused by instruments occupying or fighting for the same lower frequency that don’t need to be there. Only the bass and drums really need the lower frequency – I’ll cop some for that statement.
A Low-Pass Filter (LPF)attenuates content above a cutoff frequency, allowing lower frequencies to pass through the filter.
Shelving Equalisers come in 2 varieties High Cut and Low Cut Filters (see above).
Low Cut Filter- aka a High Pass Filter (see above) Basically this is a type of filter that removes low frequencies from an audio signal. Normally they are designed so they remove frequencies below a certain determined frequency (often somewhere between 20 Hz and 150 Hz).
High Cut Filter- aka a Low Pass Filter (see above) Normally they are designed so they remove frequencies above a certain determined frequency (somewhere upto 20,000Hz).
4. Cutting EQ Holes
Even when you’re not controlling low frequency build-up, you’ll need to cut holes in certain instruments. Similar instruments have similar frequency responses so they overlap and cover each other. Cutting or Carving out a space will allow the instrument to be heard better.
A good starting point would be to Focus on your main left and right instruments especially the ones panned hard left and right.
e.g. On say 2 guitar tracks – find a good sounding mid range frequency on the first track and boost it 3-6db. Cut that same frequency on the second track. Now find a good sounding mid range frequency on the second track and boost it 3-6db. Cut that same frequency on the first track. Your ears will pick the difference and it will make the tracks sound better, wider and not so muddy.
It’s important to let an instrument dominate it’s primary frequency range, so you should cut holes in your instruments that will compliment each other.
NOTE: What you want to try and stop, is an instrument competing for the same part of the spectrum and make sure they are strongest in their range. Yep you do this by raising/lowering the volume of certain frequencies (I see a pattern here).
5. Level Matching – Volume In equals Volume Out
For the most part when we make EQ changes we fool ourselves into thinking that the changes to a track have made it sound better because the track is louder.
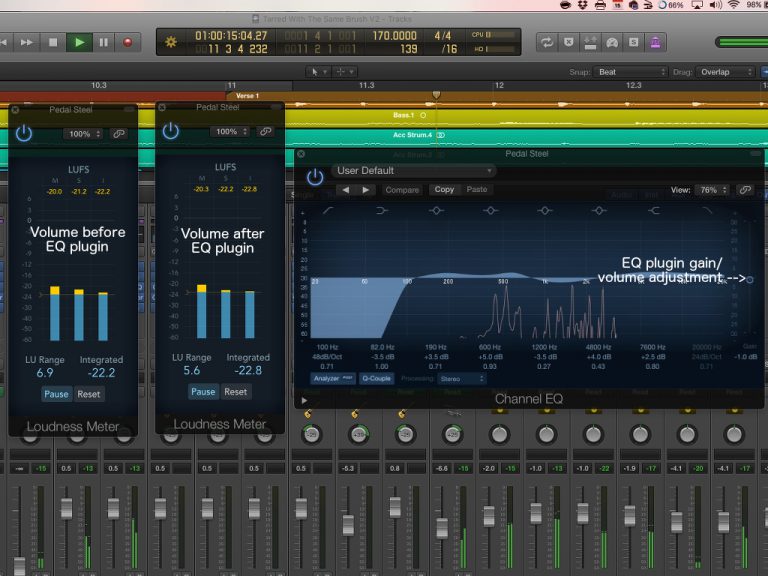
This is why we need to do what is called Level or Volume Matching. You need to ensure that the volume going into your EQ matches the volume going out of your EQ after you have made any changes. Ensure that your Volume signal meters match i.e. same loudness in equals same loudness out.
It is easier on the Pro Tools EQ (what I mentioned earlier) than the Logic Pro X plug-in as you have to use 2 Loudness Meters as well (one before and after the EQ) 😩
The point of an EQ is not to make it louder or softer, but to simply enhance the tone of a track. By level matching the volume, you will know whether or not your EQ moves are actually helping the track.
Hint: If upon level matching the EQ plugin to the original input volume, you find that the track doesn’t actually sound any better and you could achieve a similar result by simply turning the track up (volume again) in the mix. Then do that, No EQ is really needed! (yes I did say that)
So in review…
(1) Theres 3 main controls Frequency, Gain and Bandwidth/Q
(2) Subtractive EQ before Additive EQ – Cut before you Boost this tends to be better in most cases for your mix
(3) Low and High Pass Filters can be your friend they can clear the mud but they can be a double edged sword leading to a thin sound
(4) Cutting EQ Holes – on tracks hard panned left and right
(5) Level Matching – Volume in equals Volume out, this way you don’t fool your ears
and
(6) Don’t assume every track needs EQ.
(7) Presets they are generic and therefore don’t know your track or anything about it.
Remember no matter which DAW you use, how you use EQ will greatly affect the outcome of your mix.
Now in summing up, yes I believe that an EQ is simply a smart volume knob, no more, no less – others however will argue that point.
I believe it is, because it is used to turn up or down the frequencies you need to enhance a track – simple logic isn’t it, just think of it as a Volume knob and it will help you.
The Ultimate EQ Cheat Sheet for Every Common Instrument
Vocals
The human voice: simultaneously one of the most fickle and yet most important pieces of any mix.
Male voices, though typically lower than female, are actually more complex in their overtone structure, meaning that at least equal attention needs to be paid to the high end of a male vocal as a female.
100 Hz and below- Rumble: For most vocals, all you’ll find down here is mic-handling noise, stage/floor vibrations, air conditioners, etc. Get rid of it
200 Hz – Boom: This frequency is usually where you’ll find the “head cold” sound. The female voice may run a little higher, but this is the ballpark. Anyone with allergies or sinus issues knows exactly what I’m talking about.
800 to 1,000 Hz- Word Clarity/Nasality: Not enough and intelligibility of some lyrics may be unintelligible, too much and you get the teacher from Peanuts
3,000 Hz- Presence/Excitement: This is right around the point that tends to add some energy, or some “buzz” to a vocal. Not enough, and the vocal may sound deflated, flat, and dull. Too much, and your listener will feel like he or she is getting poked in the ear canal with a chopstick every time the vocalist opens his or her mouth.
4,000 to 8,000 Hz – Sizzle/Sibilants: Typically this is the range a de-esser is handling. If your vocalist sounds like meat hitting a hot pan at the end of any word ending in “s” or a similar sound, this is where to hunt.
10,000 Hz and up – Air: Want to “open up” your vocal a little? Apply a light shelf boost around here and that should do it. This is not always necessary, though, and simply adding “air” for the sake of it can make things harsh, brittle, and introduce noise to the sound.
Drums
Kick While the snare may arguably be the most vocal drum in the kit, the kick has an amazing array of possibilities for tonal shaping.In many ways, I think you can really measure an engineer/mixer’s abilities on how a kick sounds and how it sits in the mix.
40 to 60 Hz – Bottom: The tone of the reverberation in the shell, sometimes too rumbly, can be undefined/indeterminate depending on the mic’ing/speakers.
60 to 100 Hz – Thump: The “punch you in the chest” range of the kick.
100 to 200 Hz – Body: This is the “meat,” if you will, of the kick sound.
200 to 2,000 Hz – Ring/Hollowness: This large band is where you can often find issues with ringing and muddy kick sounds.
2,000 to 4,000 Hz – Beater Attack: This is the range to look for the “thwack” sound of the beater, critical for getting that “basketball bouncing” kick sound.
Snare 200 to 400 Hz – Body/Bottom: The central fundamental of most snares tends to live somewhere in this range.
400 to 800 Hz – Ring: This is the range that tends to give that hollow “ring” to a snare tone that’s often undesirable. Crush this range too much, though, and your snare will start to lose some life and sound two-dimensional in the mix.
2,000 to 4,000 Hz – Attack: The stick on head “crack” is often found around 8,000 Hz (Sizzle and Snap). The overtone sound of the snares themselves can either be accented or dampened somewhere around this point.
Toms 100 to 300 Hz – Body: Depends on tuning, but a good place to look for the “boom” of a tom sound. Too much and things will sound, well, “boomy.” Remove too much, and your toms will sound like cardboard boxes.
3,000 to 4,000 Hz – Attack: Just as it sounds, this is the the attack of the drum itself from a stick on its head.
Cymbals 200 to 300 Hz – Clank: Here’s where, especially on your hi-hats, the “chink” sound of the cymbal lives. As always, season to taste.
6,000 Hz and up – Sizzle: This range is where the “tssssssss” part of the cymbals can be brightened up to add some more life and “air” to a cymbal wash, or you can spontaneously start bleeding from the ears if used without prejudice.
Synth “Kick” (808) Ah yes, the 808. It’s often used and referred to as a kick, but it tends to act more as a very low tom, as it has a pitch. This thing is the Loch Ness Monster – there tends to be more under the water.
The best way to deal with a true, clean 808 sample is to work around it. It’s usually best to let the 808 do its thing and to get the bottom end around it the hell out of the way.
If it’s a fuzzy sample or has been driven and squashed, you may need to play with things above 250 Hz, but usually live and let live is the best approach.
Bass The reason the kick and the bass tend to be mortal enemies in many mixes is they can literally occupy identical sonic space from a frequency perspective. So before reaching in with any EQ, listen to both and decide where one will take the lead over the other, and in which ranges.
40 to 80 Hz – Bottom: Especially with five-string variations, this is where the bottom resonances of most basses live.
80 to 200 Hz – Fundamentals: The primary fundamental of the bass. Right around 180 to 200 Hz is where you can try to cut in on a bass that is too “boomy” to clean it up while preserving fundamentals.
200 to 600 Hz – Overtones: These are the upper harmonics of most bass tones, depending on the sound you’re interested in. If you’re having trouble getting a bass to cut through in a mix, especially a low-end heavy one or one that’s getting played back on smaller speakers, this can be where to look.
300 to 500 Hz – Wood: Particularly in upright basses, it’s that distinctive, woody bark.
800 to 1,600k Hz – Bite: The growl and attack of most basses can be either emphasized or toned down around here.
2,000 to 5,000 Hz – String noise: Pretty straightforward here, I think.
Guitar
Acoustic 120 to 200 Hz – Boom/Body: This is where you’ll find most of the explosive low end on a mic’d acoustic that tends to feedback in the live world or be disruptive in the studio. Alittle bit here adds warmth and fullness on a solo performance, but in a dense band mix, it’s probably better to get it out of the way.
200 to 400 Hz – Thickness/Wood: This is the main “body” of most acoustic tones. Too many cuts here, and you’re going to lose the life of the guitar somewhat
2,000 Hz – Definition/Harshness: This double-edged sword band will give the definition to the acoustic tone to hear intricacies in chords and picking, but too much will make it harsh and aggressive.
7,000 Hz – Air/Sparkle: Atouch, and I mean a touch, of a shelf boost here can help open up an acoustic sound.
A note on acoustic guitar pickups (piezo, in particular): Making crazy 10 dB cuts?Contemplating making some absurd boost? You’re probably not wrong – the acoustic pickup world can be the Wild West when it comes to tone. Some are great, and some are downright questionable.
There are too many variables to even begin suggesting frequencies, so use your ears to guide you home on this one.
Electric In general, I find a light hand with broad strokes to be most effective on electric guitar, if any EQ is applied at all other than some filtering. If you do decide to go hunting, however:
80 to 90 Hz and below – Mud: Lose it, crush it with your HP filter. There’s pretty much nothing useful down here, and it will almost always just equate to flabbiness and noise in your tone.
150 to 200 Hz – Thickness: This is where the “guts” of a guitar normally come from, but again, can quickly cloud a mix on you.Use sparingly, perhaps automate to add sweetness to a solo section or an exposed part, and then tuck it away when things thicken up again.
300 to 1,000 Hz – Life: I call this the “life” of the electric, as many of the things that make an electric sound like an electric live in this range.
So attenuating needs to be taken into consideration carefully. Too much though, and you start fighting with your snare and things like that, so take note.
1,000 to 2,000 Hz – Honk: This is where honky and harsh characteristics can usually be smoothed out with a wide cut centered somewhere in this range.
3,000 to 8,000 Hz – Brilliance and Presence: This is the range that can add shimmer or allow a guitar to cut through a mix when boosted. It can also be where you make cuts to keep a guitar from conflicting with a vocal.
If making boosts in this range, keep an eye (ear?) out for noise, as any noise present from distortion/effects pedals will very quickly be accentuated as well.
Keyboards
Piano When looking at acoustic pianos, there are so many variations that can lead to differences in tone: upright vs. grand, hammer types, mechanical condition, the player, mic choices, and mic techniques.
No matter what, though, the piano tends to be a behemoth in the mix – for better or worse – so most often you’ll be looking to cut holes out for other things in your mix.
100 to 200 Hz – Boom: This can be a great place to add a little warmth to a solo piano in a studio environment, but more often than not will be the first place to cut some of the girth in a piano in a mix or help reduce feedback potential in a live situation.
3,000 Hz and above – Presence: Adding a little “air” here can be great to brighten up a dark piano tone, depending on mic placement. Be careful not to bring out the noise of dampers on strings (particularly in the 3,000 to 5,000 Hz range), as this can quickly become distracting and jarring.
Electric Piano (Rhodes): If we’re dealing with a real electric piano over a sample, things can be very situational as amp, mic’ing, and condition of the instrument itself can play such a huge role.
100 to 200 Hz – Boom: As with its acoustic counterpart, the low end can go from lush to overgrown Jurassic underbrush quickly. Particularly with the rich, dense harmonics of something like a Rhodes, cutting “mud” is usually your first order of business.
800 to 1,000 Hz – Bark: Managing the “bark” and damper noise can sometimes be an issue, but if things are cutting through too much, odds are it’s somewhere in this range.
Clavinet Honestly, I find myself treating this similarly to electric guitar, which is fitting considering the method of sound production. There are some idiosyncrasies to navigate with the attack that set it apart from its shoulder-slung brethren, but many of the same principles apply.
Organ (B3) Much of a B3’s magic comes from good mic placement and the player (the right drawbar settings are game changers). EQshould be applied sparingly and mainly as a corrective measure. Concerning measurement, wireless data logger and other typersare the best in recording measurements at specific intervals.
Usually it’s good to look to anything clashing with the bass (80 to 180 Hz), and if it’s feeling a little “chubby” in the middle and either can’t get out of its own way or doesn’t play nice with other mid-heavy instruments or guitars, look to make cuts somewhere between 300 to 500 Hz.
Synths While the near-infinite possibilities in the synth world can make this a hard one to generalize, there are some places you may start to look:
400 to 600 Hz – Thickness: Many synth sounds can get kind of muddy in this range and mess with the clarity of the sound itself, especially when you start layering multiple synths. Searching somewhere in this range is a good place to start
1,000 to 2,000 Hz – Cut/Bite: This is where you can usually find the attributes of a synth patch that are going to help it poke through the mix. Cut here to help tuck something back and out of the way, from guitars to vocals.
3,000 to 4,000 Hz – Presence/Clarity: Also like voice and guitar, this range helps add excitement to a sound. And also like just about everything else mentioned here, too much of a good thing can be painful.
Anyway I have rambled on for too long, hey if you see me out on the road say gday or hit me up on UHF Channel 40
Till next time, take care, yours in country music – Leigh