Although recording a song, is where the fun begins, mixing is where you get to shape the sound of and feeling of, that song – your song! EQ and Compression, would have to be in my opinion, perhaps your most powerful tools in recording/mixing, think about it, these tools can give your tracks and your song, depth, clarity and more! Part 2 is about Compression whereas Part 1 (here) was about EQ.
Remember: make sure that your basic mix is ready i.e. Volume and Panning (not automation) are complete and that the track has been recorded properly – if the track has not been recorded properly, it may just save you time in the long run to record it again.
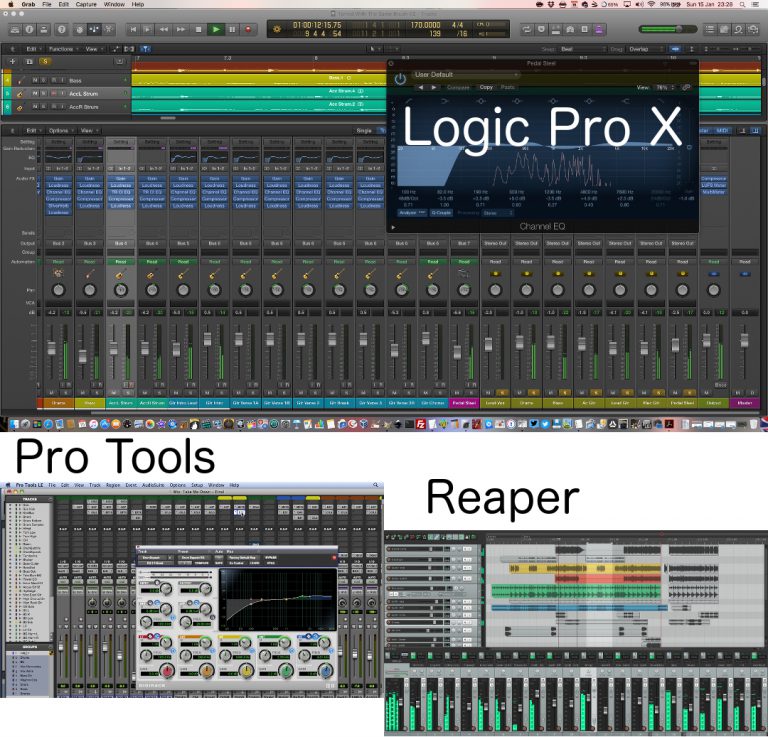
Now just because I like and use Logic Pro X (I’m now also using Pro Tools) doesn’t mean you have to and besides, the principles are the same. So even though the industry standard being pushed is Pro Tools, you could use one called Reaper (price is excellent – free or donation) or others the choice is yours. OK lets begin…
COMPRESSOR – THE FUN BEGINS!!
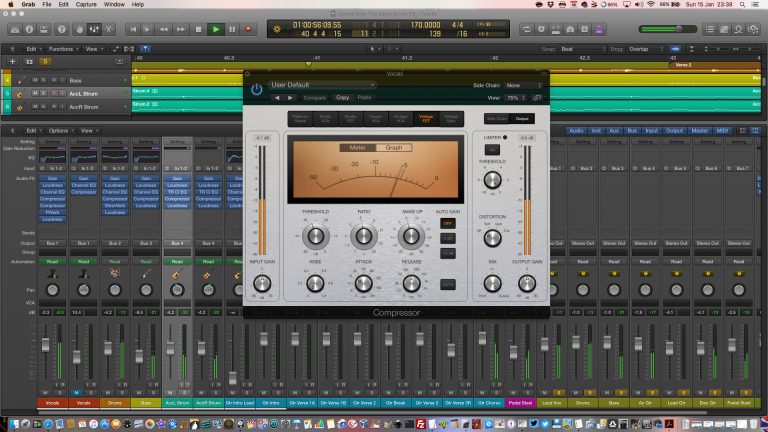
Now whether you’ve been mixing for years or this is your first mix (don’t be scared), remember, if you approach this with the right mindset, then hopefully, these 2 posts will help you, help you get the best sound possible in your mixes. And like Part 1 there is a summary at the end.
There are several components involved in using Compression and indeed several ways to implement compression – just remember I did also say think of it as a giant automated volume control and thats basically our first Heading…
#1 – Compressor: An Automated Volume Control
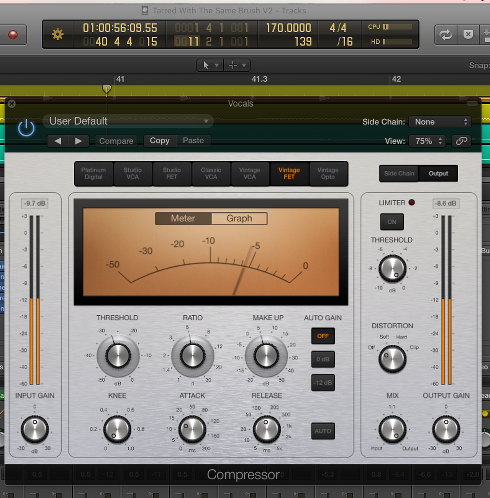
What Do We Mean?
Now if you think of a compressor as an automated volume control you’re on the right track (bear with me).
Think about that for a second, it can turn down the loud parts or peaks of a track and also turn up the quiet parts of a track both at the same time.
This in turn makes the track or tracks sound even and smooth – pretty good don’t you think for a volume control? Yep a fair dinkum Automated Volume Control at that! 😃
#2 – Compressor Types VCA, OPTO & FET

Compressors are used for different tasks with some sounding better in certain situations than others.
Although people will recommend certain types for certain instruments including vocals again really it is personal choice because if you like the sound then that is what matters.
VCA Compression:
Voltage Controlled Amplifier compressors use an integrated circuit to give very precise control. They are less colored and suffer from very few side effects like distortion, which make them ideal for lots of different tasks.
Logic Pro has Studio (similar to the Focusrite Red), Classic (similar to the dbx 160) and Vintage (similar to the SSL) VCA Compressors.
Great for: Instruments with complex harmonics (12-string guitars, pianos and harpsichords).
Opto Compression:
Opto, meaning optical, describes the light sensitive circuits that control the compression amount in opto compressors. They often react more slowly than other compressor types, but this can be desirable.
The famed Teletronix LA2A is an optical compressor that many producers swear by for vocals and mix bus compression. The LA2A is also a ‘leveling amplifier’ — which means it is working nearly all the time, not just when a threshold is reached.
Logic Pro has one called Vintage Opto(similar to the LA-2A).
Great for: Individual instruments like vocals, piano, and bass.
FET Compression:
Field Effect Compressors use transistors to emulate a valve sound with more reliability, but with a higher signal to noise ratio. They are popular for vocals and great for drum compression.
The Urei 1176 is a FET compressor. Logic Prohas Studio (similar to the 1176 Rev E “Blackface”) and Vintage (similar to the 1176 Rev A “Bluestripe”) FET Compressors.
Great for: Individual instruments like snare, vocal, guitar.
Platinum Compression:
This is Logic Pro’s original Compressor and is a clean sounding compressor and similar to Platinum Analog Tape.
#3 – Main Controls of a Compressor
1. Threshold: The volume at which you tell the compressor to turn down the audio, i.e. how loud the signal has to be before compression is applied.
2. Ratio: How hard/aggressive the compressor turns down the audio e.g. if the compression ratio is set for 6:1, the input signal will have to cross the threshold by 6 dB for the output level to increase by 1dB.
3. Makeup (gain): Allows you to boost the compressed signal, as compression often attenuates the signal significantly.
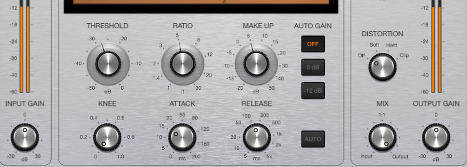
4. Knee: There are two types of knee setting, hard and soft and this sets how the compressor reacts to signals once the threshold is passed.
Hard Knee settings mean it clamps the signal straight away, and Soft Knee means the compression kicks in more gently as the signal goes further past the threshold. A soft knee is more of a curve than an abrupt angle. Lower values result in more severe/immediate compression (hard knee). Higher values result in gentler compression (soft knee).
5. Attack: How fast or quickly do you want the compressor to work?
6. Release: How do you want the compressor to “let go” of the audio? i.e. how soon after the signal dips below the threshold the compressor stops.
7. Output: allows you to boost or attenuate the level of the signal output from the compressor AND level match the volume to the input – There is an Input but I tend to leave this at default.
Now to be truthful I prefer to level match the Volume using the Make Up gain – choice tho is yours.

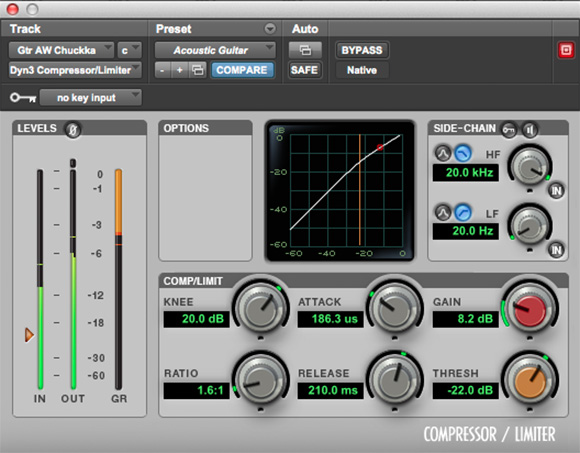
NOTE: Not wanting to confuse anyone but not all compressors have these controls (see picture below). This means that several of the controls are fixed in their settings.
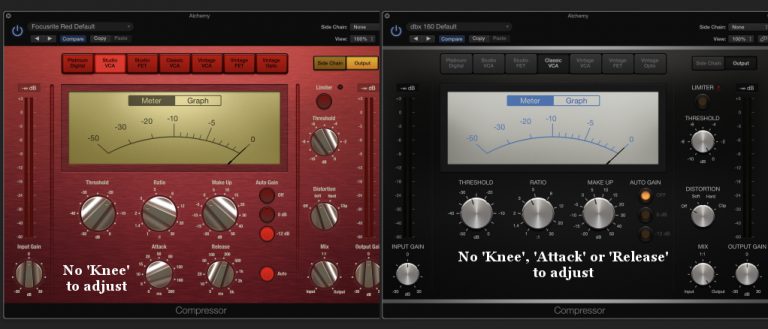
#4 – Compressor set up
a. Threshold & Ratio

Remember: Threshold and Ratiowork together. Adjust them together and see how they affect the output.
(i) Adjust the threshold until the peaks in the signal are pushing over the threshold and triggering the compressor. The compressor ONLY turns down audio that crosses the threshold, nothing below it.
Remember: If the threshold is at 0db, no compression is happening.
(ii) The 3 – 6db Rule: Set the threshold while watching the gain reduction (or attenuation) meter on your compressor. Look for a 3db to 6db amount of gain reduction on the loudest peaks of that track. This is where to leave your threshold setting.
(iii) Remember to set the Ratio to suit the material. Bass guitars sound good at 4:1, drums at 2:1, vocals also at 2:1 and electric guitars anywhere from 2:1 to 6:1.
(iv) Pay attention to the gain reduction rather than what the numbers say when it comes to ratio or threshold – most important.
Remember watch that meter while you adjust the ratio or threshold and when you see the the gain reduction you want, leave those knobs where they are.
b. Attack & Release
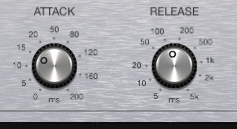
The Attack and Release controls shape how the compressor reacts.
(i) Slow attack can give more “energy” and “life” whereas fast attack can give more “sustain” or “fatness”. The slower the attack time the more of the transient (and dynamics) you allow to come through.
A fast attack would be useful for anything that has sudden peaks early in the signal e.g. Bass. Slower attack times suit mastering uses and buss compression.
(ii) The faster the release, the quicker you let the compressor reset before the next transient. Try to start with a medium release and move faster as necessary.
(iii) To hear what the compressor is really doing, try using extreme attack and release settings and then dial them back until it sounds more natural.
(iv) The release control can really affect the sound of the compressor. Short release times cause the compressor to sound like it’s working hard, but long release times sound more natural.
c. Make Up Gain
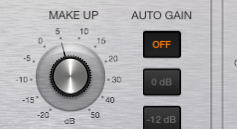
(i) Use the Make-Up gain to sit the signal back into the mix without adding any unnecessary volume or noise.
(ii) The Make-Up gain is something that I use for Volume Level matching ensuring that the Output Gain level is the same as the Input Gain level. This is important so that what you’re hearing is actually the changes made and not just thinking it sounds better because it is louder.
Unfortunately, some people have tinnitus problem which affects the quality of their hearing. If you’re wondering how does tinnitus go away, go to stoptheringing website.
NOTE: I do not use Auto Gain if it is there as I prefer to level match the Volumes.
d. Knee
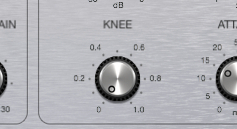
Setting the Knee can and does depend on the instrument recorded.
(i) A hard Knee works well for drums, bass and percussive stuff.
(ii) A soft Knee is more transparent and better for vocals and some guitar parts.
Remember: For every rule about setting up compressors, I, like many others have broken the rules and many have made great sounding recordings, so play with it and experiment – nothing ventured nothing gained.
Warning: Using Compression on the way to your recording format, can’t be undone. I prefer not to use Compression whilst recording, instead preferring to save that step for when doing the mixing process.
Once you are comfortable with using Compression then you could try Stacking, Parallel or Mix Buss Compression…
#5 – Compressor Stacking
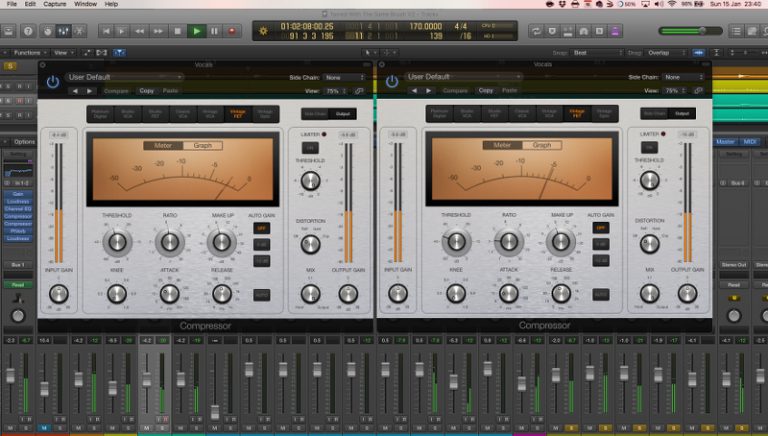
Using two (same) compressors on the same track, you can create a more “compressed” and radio ready vocal sound without having to push any one compressor too hard.
In essence you are compressing the already compressed sound.
Set the vocal compression to say a 2:1 ratio with 3db of gain reduction on the loud peaks. Duplicate that compressor and insert it right after the first one.
Adjust the output/gain knob of the second compressor to make sure you aren’t making the vocal too loud say 1db of gain reduction. You would be surprised how well it can make the vocals sound.
#6 – Parallel Compression
Run it in parallel with a given track. Use an aggressive compression on a copy of the original track and then blend that compressed version in with the uncompressed version. This technique can give your drums weight and power.
#7 – Mix Buss Compression
Some gentle compression on the mix buss (master output fader) can be what glues your mix together and give it a bit of power. A slow attack and fast release ensures you don’t squash all your transients.
This keeps the mix sounding natural. A subtle amount of gain reduction usually around 1-2db at the most is all that is needed on the loudest peaks.
Reminder: Turn up the makeup gain so that the compressor is level matched (same volume with it on or off). It should peak around the same place on the meter, but will sound and feel a bit louder because you have raised the average volume.
#8 – Things To Watch
(i) The faster the attack, the more of the transient you turn down. The more of the transient you turn down, the less natural and dynamic the track is.
(ii) The lower the threshold, the more of your track gets compressed. Aim for compressing only the loudest peaks of a track by having a higher threshold.
(iii) Compression presets can give you good starting points for attack, release, and ratio. However don’t trust the threshold and makeup gain knobs as they have no idea how loud your track is.
Make sure you turn off the makeup gain until you see the gain reduction you want with the threshold. Then adjust the gain knob as necessary to level match the plugin.
#9 – Summary
So there you go, next to EQ, compression is your most powerful tool for changing the dynamics your mix.
When used correctly, you can bring more power, excitement and energy to your tracks and song. In summary when you use compression on your mix remember:
(i) A compressor is an automated volume fader. You can turn down the loud parts whilst simultaneously turning up the quiet parts of a track.
(ii) Slower attacks and faster releases equal the most natural results. Want more fatness, do the opposite.
(iii) Set the threshold and ratio so you see 3-6db of gain reduction. Both knobs are interconnected, so adjust accordingly while watching the gain reduction meter.
(iv) Stack compressors for an up front vocal sound. Two identical compressors with gentle settings can sound better than one compressor working hard.
(v) Consider some gentle compression on the mix buss. Some slow attack, fast release, compression on the master fader can tighten up your mix in seconds.
(vi) Parallel compression is a powerful secret. Extreme compression on a copy of a track, blended in with the unaffected original is the secret to that in your face and yet natural sound.
(viii) Remember the 3 things to watch: The faster the attack the more transient you turn down, The lower the threshold the more of your track gets compressed, Presets can be a good start but don’t trust the threshold and makeup gain knobs.
Anyway I have rambled on for too long, hey if you see me out on the road say gday or hit me up on UHF Channel 40
Till next time, take care, yours in country music – Leigh

One thought on “EQ & Compression Are They Just Smart Volume Controls – What, How To & Why (Part 2 Of 2 Compression)”
Comments are closed.